GSR Testing

Got my GSR sensor for Seeedstudio. I don’t know how it works, so I will just copy the product description here:

“GSR, standing for galvanic skin response, is a method of measuring the electrical conductance of the skin. Strong emotion can cause stimulus to your sympathetic nervous system, resulting more sweat being secreted by the sweat glands. Grove – GSR allows you to spot such strong emotions by simple attaching two electrodes to two fingers on one hand, an interesting gear to create emotion related projects, like sleep quality monitor.”

I also created an app to visualise the data from GSR sensor. Here is the Demo Video.
Post to Twitter Post to Plurk Post to Yahoo Buzz Post to Delicious Post to Digg Post to Facebook Post to MySpace Post to Ping.fm Post to Reddit Post to StumbleUpon

Read More

Arduino realtime data with d3js, nodejs, socketio

Last week I created a client app with Angular Framework that will receive data from a Node server with SocketIO.

Gauge was created with Angular directive and d3js.  Main Controller will update the gauge with a SocketIO event.  One is for light sensor, and the other one is for temperature sensor.  Both sensors are connected to Arduino, and data will send to Node server through serial port.

LineChart was also a real time chart, but it was not perfect yet.  Seem SVG won’t redraw when the page is not in focus(on other tab), but it would redraw right away when the page was back in focus…Would have to look where to update the chart when new data come in.

More detail will be post later on http://sunnycyk.com

Post to Twitter Post to Plurk Post to Yahoo Buzz Post to Delicious Post to Digg Post to Facebook Post to MySpace Post to Ping.fm Post to Reddit Post to StumbleUpon

Read More

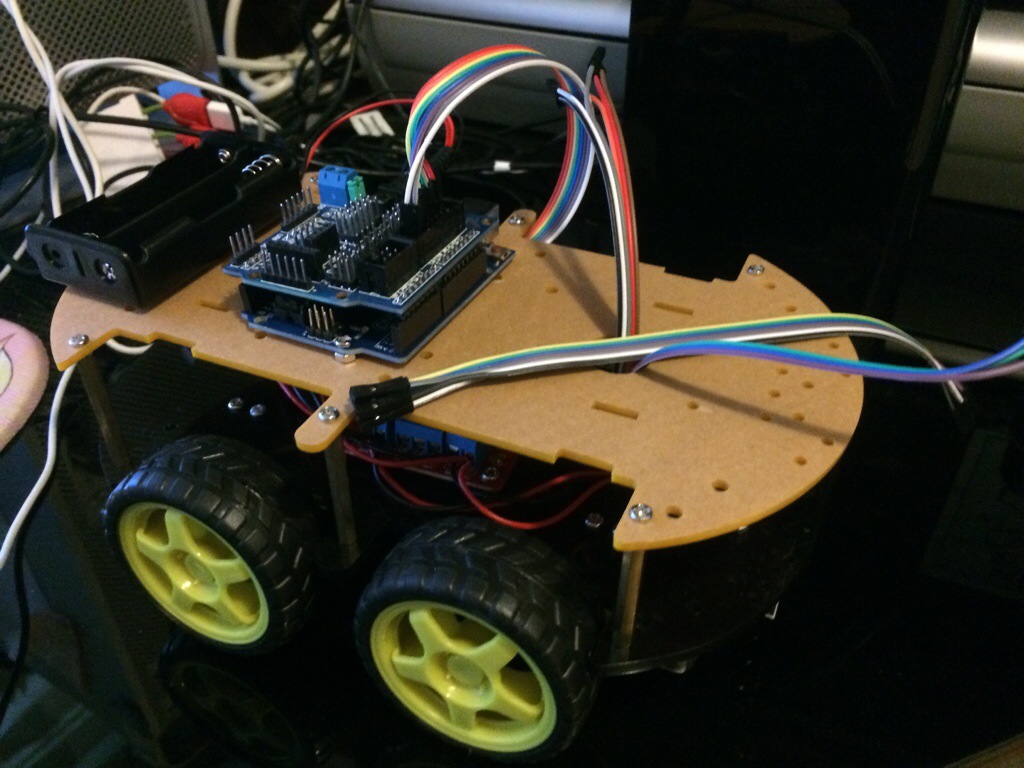
My arduino robot car

20140506-174518.jpg

This is my Arduino Robot Car. Bought it for a month and finally got time to build it. I still need to put the Ultrasonic Sensor on it, but I already had 3 line tracking sensors installed and Motor shield with motors connected. Not sure if everything was right because when I bought it, it had no document at all.. So I had to guess how to put it together.

I have not programmed it yet, but I will put up some codes later at my programming site and explained how I make everything working together. As a beginner in Arduino like me, I think it should be easier to break each program into small pieces to test each component first. Please check my programming site out later 🙂

Programming Site: http://sunnycyk.com

Post to Twitter Post to Plurk Post to Yahoo Buzz Post to Delicious Post to Digg Post to Facebook Post to MySpace Post to Ping.fm Post to Reddit Post to StumbleUpon

Read More

Arduino starter kit project 4 – Color Mixing Lamp

In project 4, a technique called Pulse Width Modulation (PMW) would be used. PMW rapidly turned the output pin high and low over a fixed period of time.

In this project, I would use three photoresistors and detected the amount of light that hit them. Each of them would be covered with three different colored gels as filters – Red, Green, Blue, so the red filter passed only red light, green filter only passed green light, and blue filter passed blue light.

Also, this time I would use a RGB LED, a LED with RGB colors. The project’s idea was to use PMW to show how strong the light of Red, Green, and Blue detected, and output to the RGB light based on the reading. this was my first time playing with photoresistor, so I was kinda excited about this experiment.

20140315-234108.jpg

20140315-234117.jpg

Post to Twitter Post to Plurk Post to Yahoo Buzz Post to Delicious Post to Digg Post to Facebook Post to MySpace Post to Ping.fm Post to Reddit Post to StumbleUpon

Read More